In this step-by-step tutorial we show you how to transfer details from a high poly object to a low poly object in Blender using cageless baking.
What is Cageless Baking?
Cageless baking means to bake maps (most often normal maps) without using a cage mesh.
In a typical high-poly -> low-poly workflow, 3D artists often create a cage mesh. This is a slightly inflated version of the low-poly model that controls how rays are projected from the low-poly surface to the high-poly surface.
The cage helps avoid projection errors (like ray misses, skewing, or gradients where they don’t belong).
Cage vs. Cageless Baking
You use cageless baking when:
- You have simple to medium complexity objects
- High and low meshes closely match
- Clean topology, no overlaps
- Small bevels, shallow details
- When you want fast iteration, minimal setup
You use cage baking when:
- You have a high complexity object
- You have large shape differences
- Deep cuts, hard bevels, floating details
- Overlapping or dense geometry
- Visible skewing or ray misses with cageless
- Organic characters & curved silhouettes
When asking yourself when to use what method, start cageless.
- If you see gradients, black spots, missing details → switch to cage
- Hero assets and complex hard-surface → cage
- Props, characters, weapons → usually cageless
Step 1: Start with a Smiley Cube
Our first goal is to make ourselves a quick high-poly object.
The easiest way to start learning is always with low complexity objects.
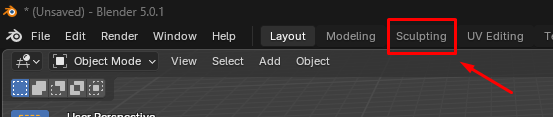
1. Start with a cube and switch to the “Sculpting” tab at the top in Blender.
2. Toggle on Dyntopo on the right side panel. Dyntopo will dynamically increase the topology of your cube. So we immediately get a higher poly object than the initial cube.
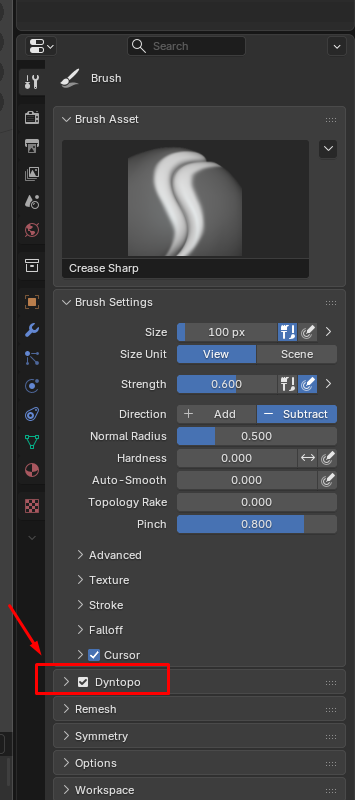
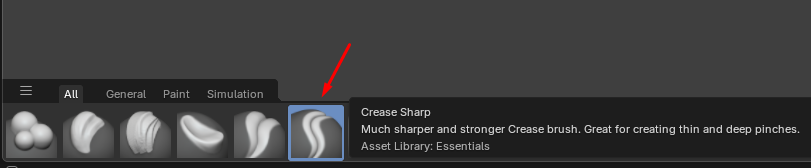
3. Select the Crease Sharp Brush at the bottom and add a face to your cube.
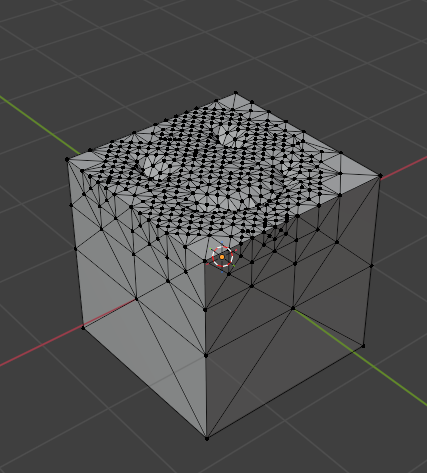
4. When switching back to Modeling in the top tab your cube should now look like this.
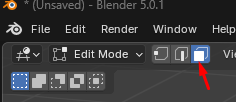
5. Go into edit mode and use the face select option.
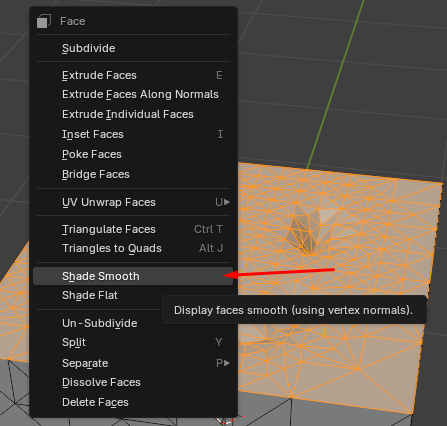
7. Then use shift + left click to select the top faces of your object until it looks like the picture below.
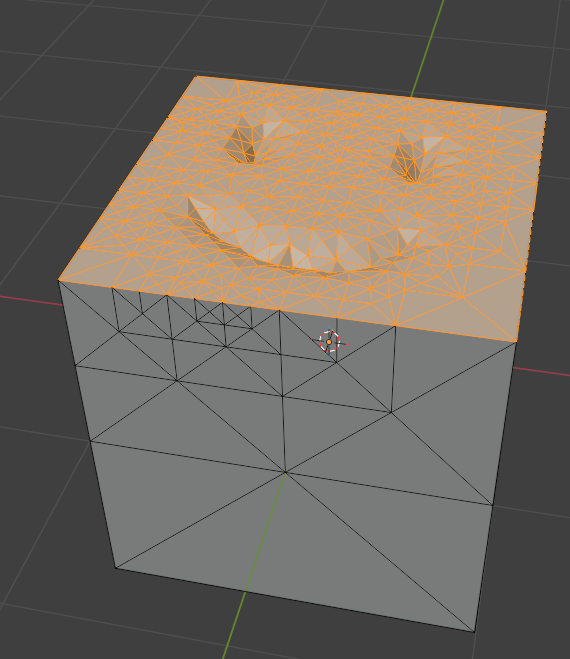
8. Then right click and select “Shade Smooth”.
Step 2: Add a Low-Poly Cube
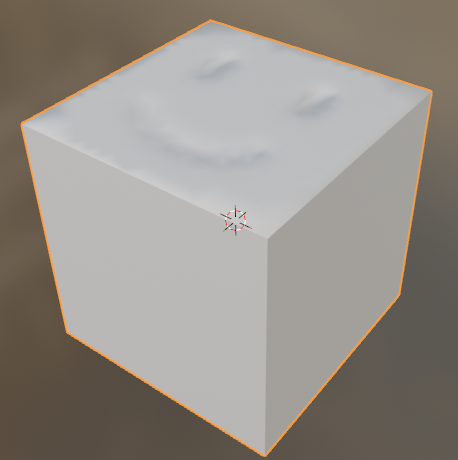
You should now have a smoothly shaded happy smile on your cube.
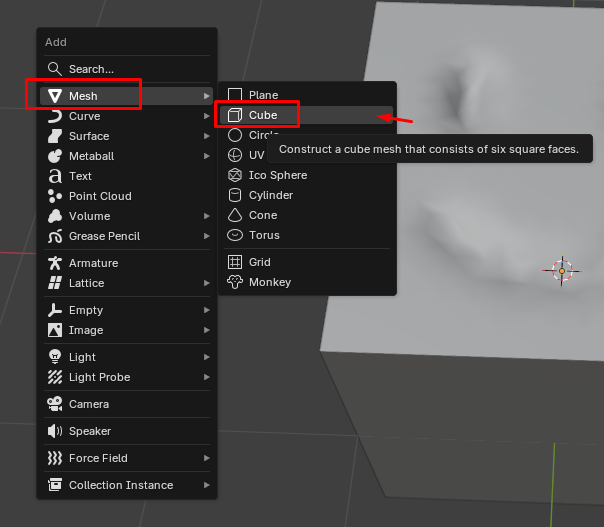
- Now add a new cube to your scene by going into object mode and using Shift + A to create a new cube.
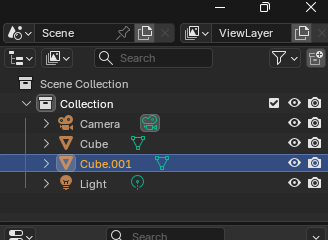
2. In your hierarchy you should now see Cube and Cube.001.
In your modeling view you should as well see two cubes on top of each other.
You do not need to move these cubes. In fact, they need to exactly overlap each other.
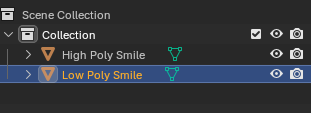
3. You can delete the Camera and Light and rename Cube to “High Poly Smile” and Cube.001 to “Low Poly Smile”.
Step 3: Add A Material
- Select the Shading tab in the top in Blender. You will now see the existing materials applied to your cubes by clicking on them in the hierarchy.

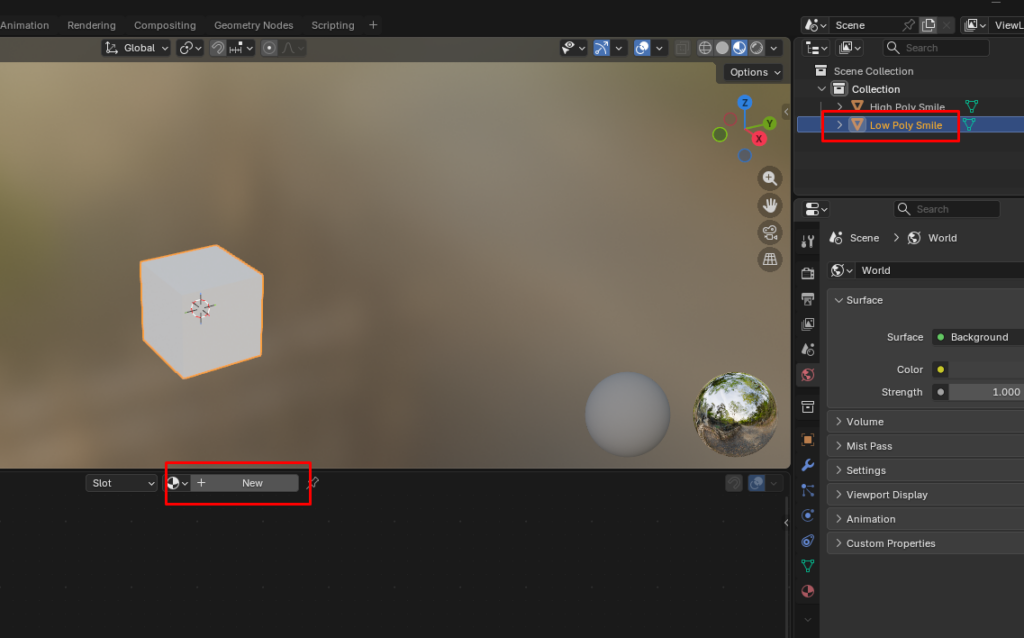
2. Select your Low Poly Smile in the hierarchy. Then select New in the view.
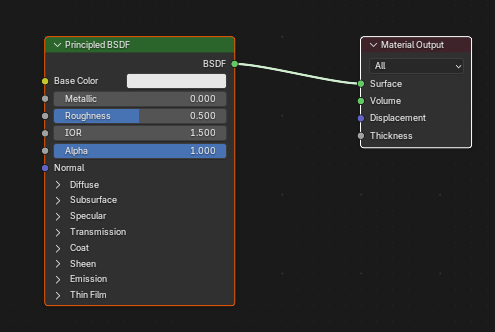
3. You should now have a new Principled BSDF material, looking like the one below.
4. Right click into the empty space next to the material or use Shift + A and add a “Image Texture”. Place it on the left side of your Principled BSDF.
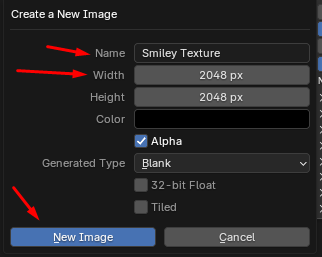
5. Click “New” for the Image Texture.

6. Name the image, adjust it’s Width and Height and click “New Image”,
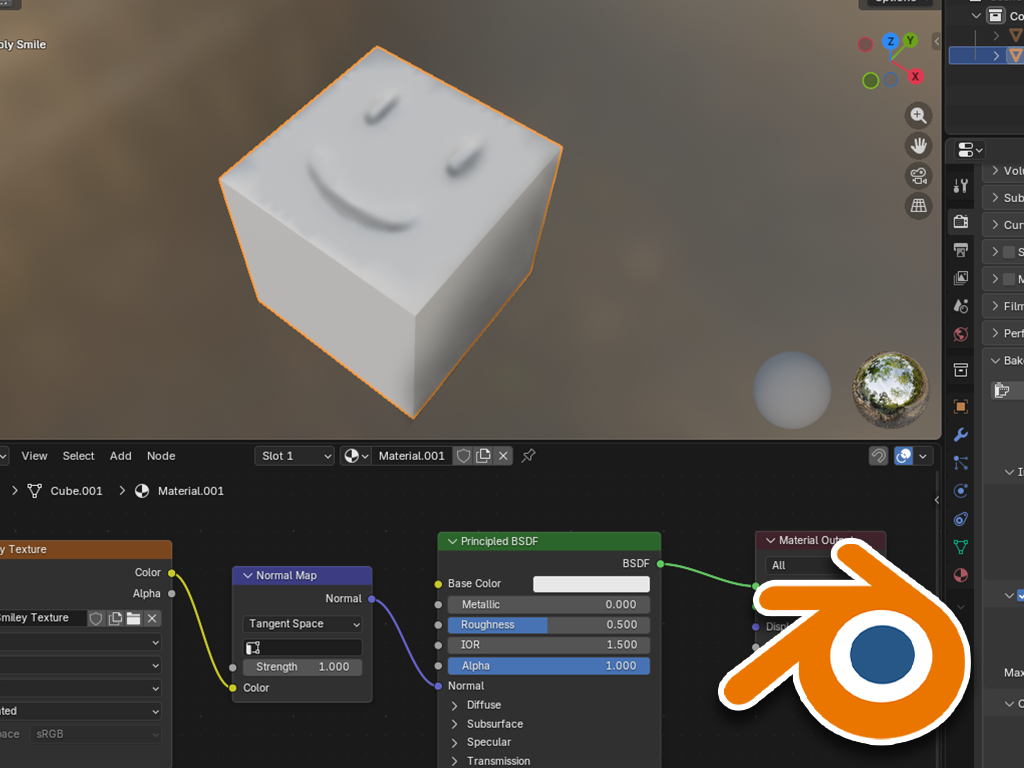
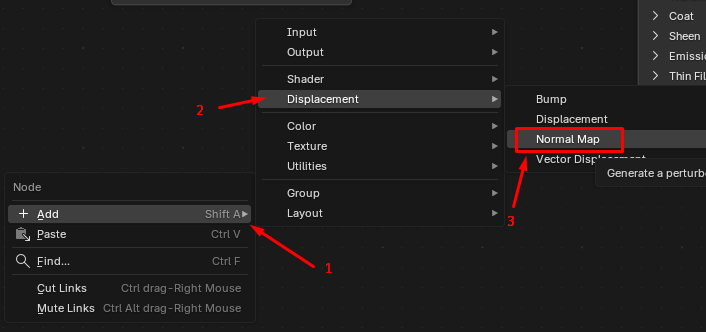
7. Now Add again with Shift + A a Displacement > Normal Map.
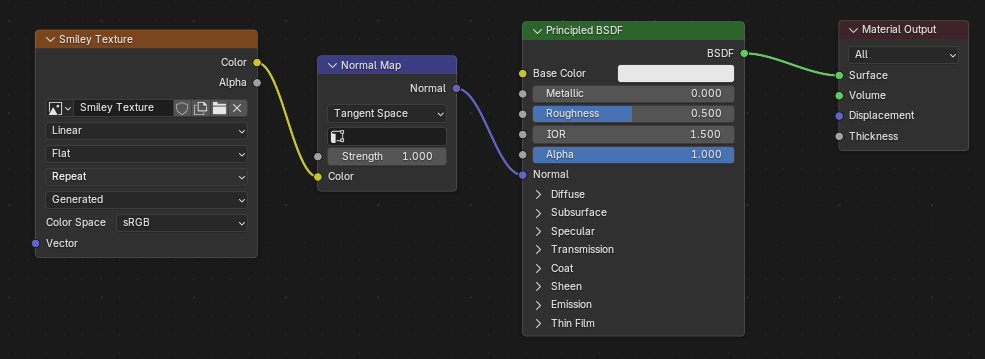
8. Place your Normal Map in between and connect the Color output and the Normal Output.
Step 4: Switch Render Pipeline
In order to be able to bake in Blender, we will need to switch our render pipline from EEVEE to Cycles.
Blender’s texture baking system is built on Cycles’ ray-tracing engine.
EEVEE doesn’t have a full baking system, as it’s designed for real-time rendering.
When you bake in Blender, you’re telling it to look at your 3D object and save all the important surface info into a flat image.
Blender then:
- Looks at the shape of your model
- Figures out the light, shadows, and surface bumps
- Draws that information into a texture file
Cycles can do this because it’s built to trace light realistically.
- Go to the render properties. Select at the top your Render Engine and switch it from EEVEE to Cycles.

Use GPU for Cycles whenever you can. Only switch to CPU when you run out of GPU memory (VRAM) or if your GPU is very old. GPUs are built fo massive parallel math, which is exactly what Cycles does.
Rule of thumb:
GPU = speed
CPU = capacity
If you get crashes, black maps, or “out of memory” errors -> switch to CPU.
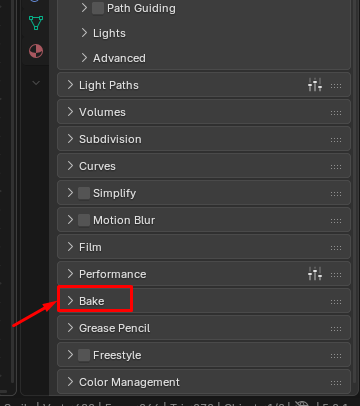
2. Scroll down in your Render Properties until you find “Bake”. Then open it up.
Step 5: Bake
Now that we are almost done!
1. Select inside the bake properties Bake Type and switch it to Normal.

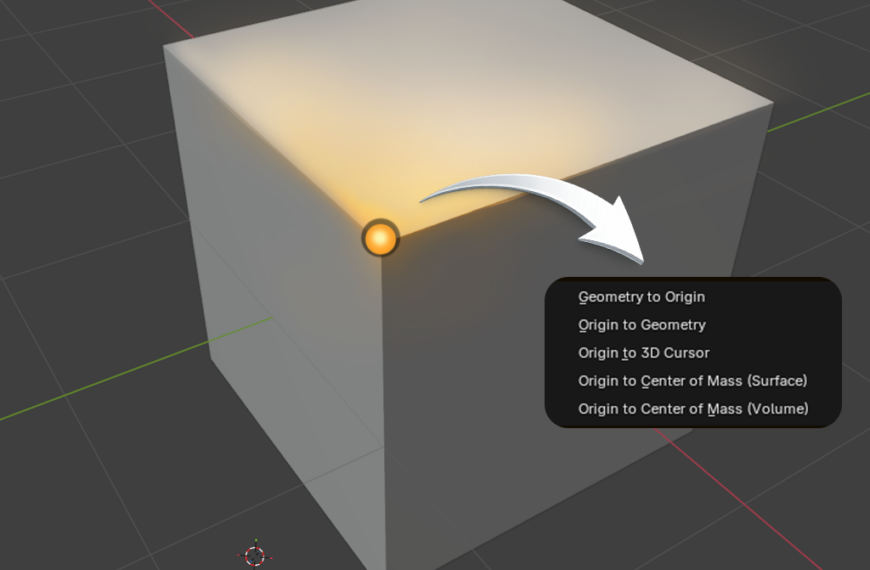
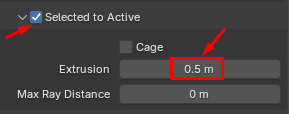
2. Check “Selected to Active” and adjust Extrusion to 0.5.
3. Now select the “Smiley Texture”. Then select the High Poly Smile. Press Ctrl and select the Low Poly Smile. Then hit Bake.
4. You will now see your normal in the view on the left. If your view looks as if it’s empty, make sure to zoom out by using your mouse wheel.
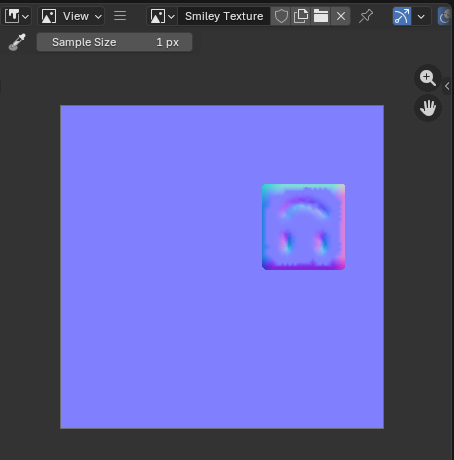
5. Congratulations, you are done! Now simply hide the high-poly object in your view. You now have all the details baked onto your low-poly object.
Did You Find This Helpful?
Then check out some of our other tutorials!
We’re always cooking up something new at Gentleland!
From exciting project updates to behind-the-scenes looks at our journey, we don’t want you to miss a single moment!
Follow us on our social channels to stay in the loop, connect with our team, and get first access to news, events, and opportunities. We’re here for you, and always ready to help fellow creators and game lovers.